

I'm not a fan of the big multiplication tables with their brash colours and their dictatorial design. Wondering how much they actually appeal to children, if perhaps they walk past them never paying them much courtesy ignoring their very intention of paying them attention. But, I'm sure that having the times table around the house does help children to learn and to remember them. Maths was not a favourite subject of mine and my mind has a tendency to freeze when trying even the simplest of equations, perhaps if there had been a more fun approach when I was a child it wouldn't have scared me so much. So, of course I just had to make a non-scarey version that would be interactive and scrambled some card, scissors, paints and a ruler from the cupboard and made our very own multiplication house.
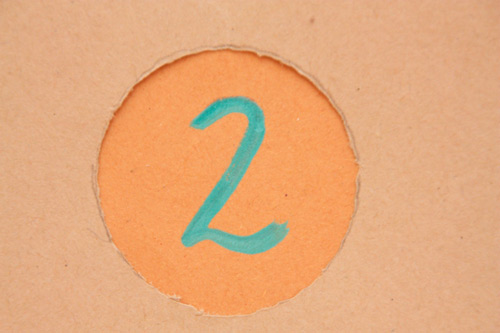
Rather than overbearing children with an unkindly set of 12 columns of numbers we chose a way of creating a fun and interactive table for each as we learn them. because the 1 times table is too complicated in its simplicity we began with the 2's. We can count in 2's and, when explaining what 'times' means its easy to find objects to put into 2's to use as visual aids because of course the first step to understanding the times tables is understanding what 'times' means.
'X' means 'lots of'. So, 3 x 2 means 3 lots of 2.

3 lots of 2 is 6
or
3 x 2 = 6
Here's how we made our Multiplication houses.
You will need:
- Card - I used paper here and though it works fine card would make it look a lot smarter.
- Scissors
- Paint
- Pencil
- Ruler
- Gluestick
- Craft knife
Here's how:
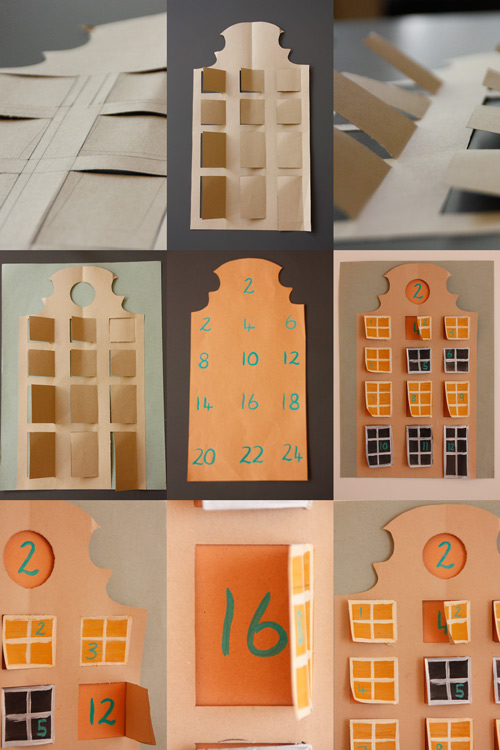
- Draw the outline of your house onto the card - whatever size you like depending on where you might put it. Cut it out.
- To make the inner sleeve draw around your house shape like a template to create the answer sheet for the inside of your house. Cut this piece out, cutting inside the line to make it smaller than the the original.
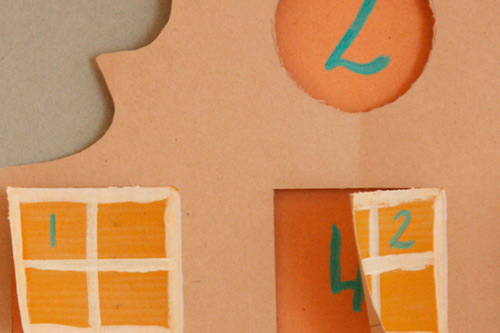
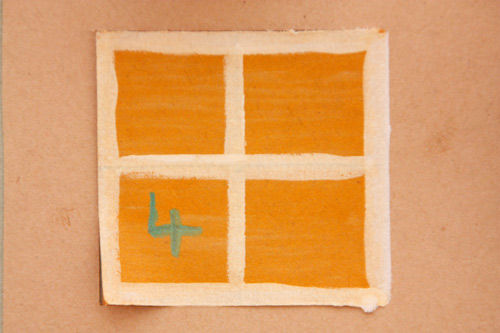
- Now taking your original house shape draw 12 windows and an extra one at the top. This is also when you can paint the windows though I didn't do this bit until later in retrospect it would have been easier at this stage. We painted each of the windows and then painted the numbers 1 through to 12 on top.
- When the paint is dry cut out the top window completely, this is where the number for each table will show. Now using your craft knife cut along each of the horizontal lines of the window and just one of the vertical side of each. To prevent making marks on your surface do the cutting on top of a chopping board.
- Use a ruler against the uncut edge of each window to fold back and open each one.
- Take a larger piece of card to use as a backing and glue the bottom side and the 2 edges of your house to the card creating an open sleeve for your times tables to slide in and out.
- Once the glue is dry slide your sleeve inside to the bottom. Then using a pencil write the number answer to each of the times table. So, for example if you are doing the 2 times table write '2' in the top window, then behind the door with '1' write '2' then the door with number '2' painted on write '4' keep going penciling in all the correct answers corresponding to each of the doors.
- Slide the sleeve out and paint over the pencil numbers with the colour paint you wish. Once dry slide it back insde and hang you house where your child can play.
You can use the inner sleeve as a template for each of the times tables so once they've mastered the 2's times table move onto the 10's then the 5's, 3's and so on. Be sure to keep each of the inner sleeves so you can slide them back in to refresh their memories.
If you have a lot of wall space to spare you could make a row of houses 1 for each of the times tables. Far more appealing than the posters I think and I love that they're interactive. Or perhaps make 2 to put side by side and when Christmas comes around the children can design their own advents to slide inside.
If you have younger children you can make them with numbers on the windows and pictures inside showing the same number of objects . Or perhaps for those learning to read you could write phonic sounds on the windows with a word inside for that sound; 'b' for 'ball' 'sh' for 'shell' and so on. Once you've made the house with its windows the inner sleeve can change as much as you like.
Happy Making
This is part of our weekly Monday Makery where we bring you a recipe to bake or a craft to create. Visit our Monday Makery when you're in need of inspiration for something to do on a rainy day or to use as interception of the words 'I'm bored', or just because being creative with your children is something you all love to do. Our other popular blogposts include 'The story behind our collections', 'Tell us its Tuesday' , An A-Z of Sisters Guild, The Art of Living posts bring you all the things we are passionate about and the things we discover in our lives as mamas, and our 'Once upon a week' gives you a glimpse into life behind the scenes at Sisters Guild.
www.sistersguild.co.uk
Sign up for future news and offers:
you could also make the window panes correspond to the number, that way you would also be showing division!
ReplyDelete